
How to Use AI to Write Blog Posts: A Step-by-Step Guide
If you’re a content writer like me, you already know how time-consuming it is to create new, relevant content that speaks to your target audience. Early in my career, writing a blog post sometimes consumed my attention for an entire workday. Thankfully, with experience comes greater efficiency and productivity. And now, I have another trick up my sleeve: I use AI to write blog posts.
How this content writer uses AI to write blog posts
Generative AI tools have exploded my productivity, assisting me in every step of blog post ideation, creation, and fine-tuning. In this post, I’ll be outlining my step-by-step process for crafting new blog posts, and most steps include some type of AI assistance.
- Step 1: Ideation and topic selection
- Step 2: Keyword research
- Step 3: Writing
- Step 4: Editing
- Step 5: Image generation
- Step 6: Publish
Step 1: Ideation and topic selection
Have you ever felt like your creative well was running dry? It’s a dilemma all content writers face at some point. This makes it challenging to come up with blog post topics, but AI helps unlock new stores of ideas.
I use a blend of free AI tools for brainstorming and topic selection, including ChatGPT and Perplexity.
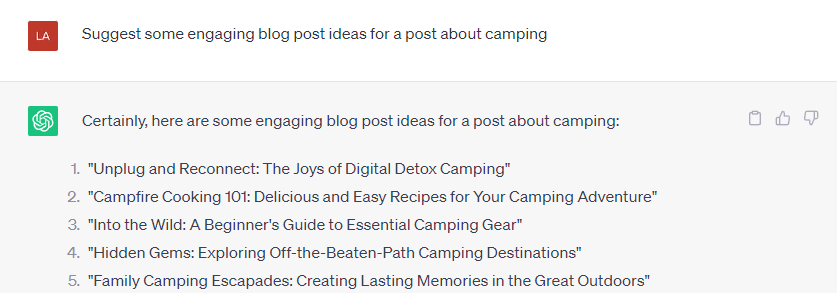
ChatGPT is fantastic for overall ideation and title suggestions. While I rarely use the titles this tool generates, they nearly always inspire me with different concepts and directions I can take for my blog posts.
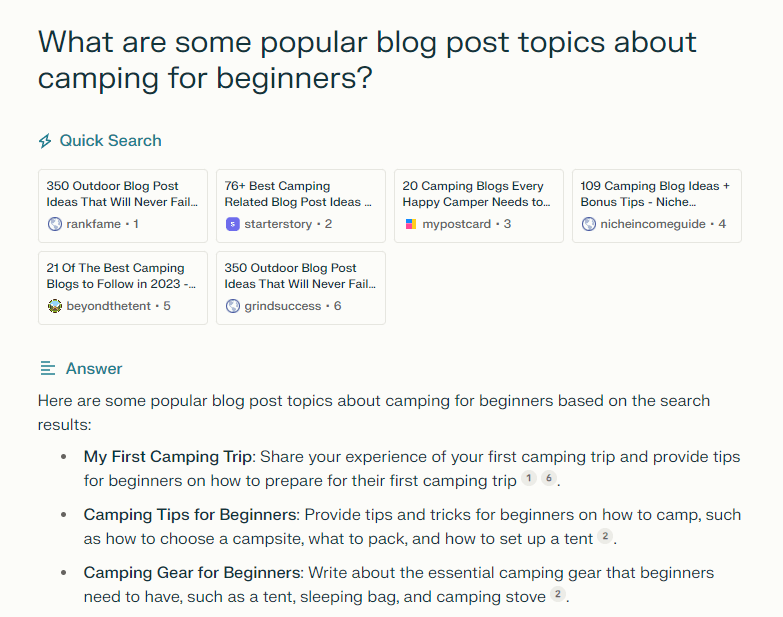
I like using Perplexity, as well. Unlike ChatGPT, Perplexity mines existing posts and links them for my review, giving me a better idea of what’s already out there — and what I can potentially link in my own post.
Used in tandem, these free tools (and others like Google Bard and Microsoft Bing), allow me to flex my creativity and explore potential ideas.
Step 2: Keyword research
The best blog posts are both fresh and relevant. We don’t want to mimic what’s already out there, but we must address the common concerns of those searching the web. Once I’ve used AI for topic ideation, it’s time to narrow my focus with keyword research.
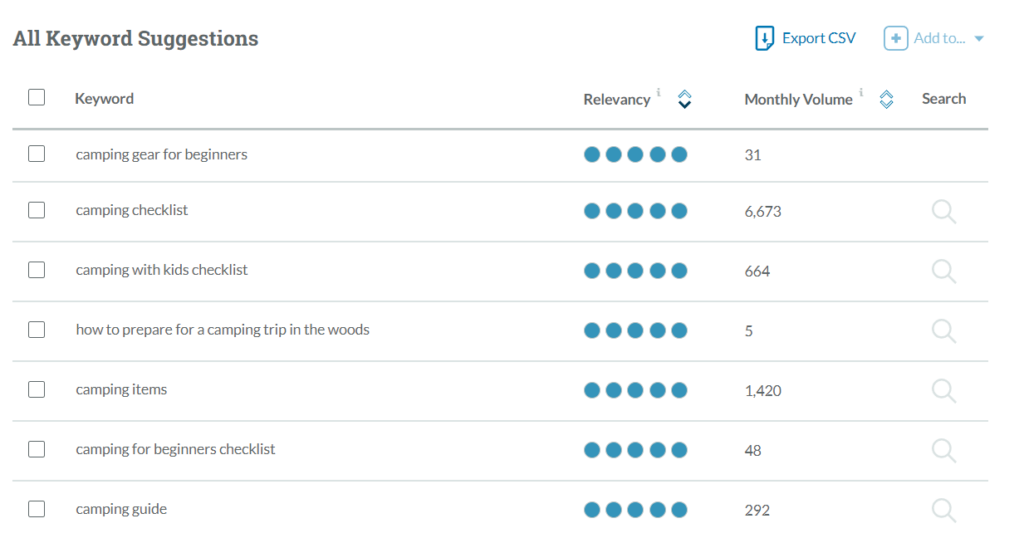
There are plenty of free keyword research tools out there, and even more paid resources. I usually use the free keyword research tool by Moz. It won’t provide all the nitty-gritty data, but the “Relevancy” and “Monthly volume” stats are extremely helpful for selecting relevant keywords.
Another great resource for keywords and relevant topics is Google’s “People also ask.” This feature appears anytime you search Google, and it reveals what real people are interested in regarding your topic.
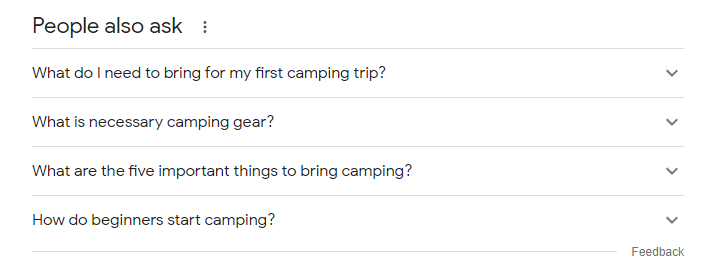
“People also ask” is helpful as you decide which pain points to cover in your blog post, and they can be great for headings and sub-headings.
Step 3: Writing
This step is where the power of generative AI really shines — and saves the most time. We no longer have to overcome writer’s block, face the intimidating blank page, or write everything from scratch.
A quick Google search will reveal just how many AI content writing tools exist today. I use Quillbee to generate my content, because the Content Brief helps bring my voice to life (learn more about how to use the Content Brief here). If you want to post content that’s original and engages readers on a personal level, tools like ChatGPT simply won’t cut it.
AI content is only as good as the prompt you use to generate it. I’ve already written a post about effectively prompting Quillbee, so be sure to check it out. Here’s an example of a Quillbee prompt for an article about camping gear for beginners:
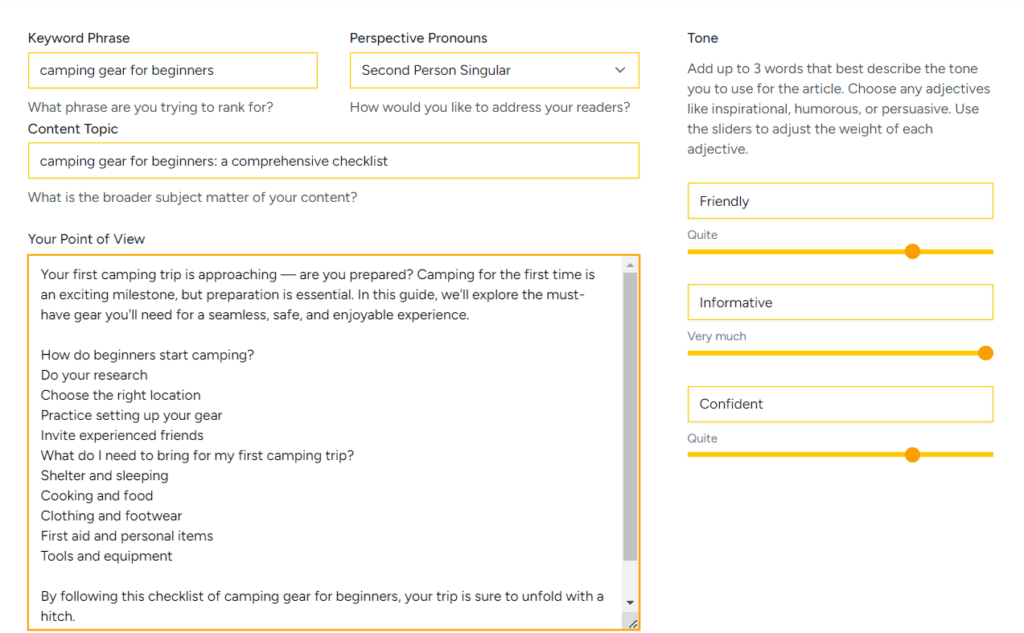
Next, ask Quillbee to generate your content, and watch the magic happen. Now, you’ve got a complete first draft that would have taken you hours to write without AI. But your work isn’t done quite yet.
Step 4: Editing
Content written by AI is a fantastic starting point, but it’s your rough draft in every sense of the phrase. As writers, we should never publish AI content without thoroughly editing and humanizing it first.
My editing process includes several iterations. First, I read the AI-created blog post from start to finish. If there are any glaring issues, I fix those right away. Second, I brainstorm ways to add a personal touch, whether that’s a past experience or unique perspective.
Next, I read the content again and make note of any claims made in the post. Those always need to be fact-checked and cross-referenced from reputable sources — link them to add greater credibility to your post. AI has been known to generate factual errors and complete falsehoods, called AI hallucinations, which can jeopardize audience trust or lead them astray.
My final editing step is using an AI-based grammar, syntax, and plagiarism scanner like Grammarly. Since I write for a living, I’ve invested in the premium version of this tool (a business expense I write off on my taxes), but Grammarly’s free scanner is still very helpful and certainly better than nothing.
Step 5: Image generation
Have you ever clicked on an article link, only to be visually bombarded with a wall of text? Images help break up your content, bring it to life for readers, and improve your SEO ranking. As you can see from this post, I often use screenshots to drive my points home, but screen shots aren’t always the right choice.
Instead of paying for stock images, I use AI to generate original and eye-catching images for my blog posts. DALL-E2 is one of the most well-known AI image generators, but it’s a paid tool. I’ve had decent results with Canva’s free text-to-image generator.
Here’s an example of an image created by Canva using the prompt, “camping at night:”

Not too shabby for a free tool! Of course, AI, particularly free AI, has its limitations. I’ve noticed Canva doesn’t generate usable images of people. The details don’t come out properly, especially faces and hands.

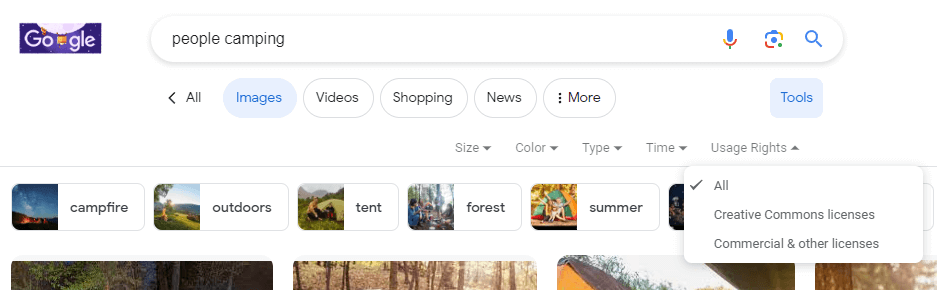
It’s hilarious, but not helpful for blog posts. If you need images featuring people, I recommend a free stock photo resource like Pixabay. You can also use Google image search, and then filter the results for fair use images that aren’t copyrighted. (Tools>Usage Rights>Creative Commons licenses.)
Step 6: Publish
After one final proofread (a best practice for any writer), there’s nothing left to do but publish your blog post — and celebrate! You’ve saved hours by using AI to create a fresh, relevant, and engaging article.
Don’t fear AI: harness it!
Every time I use AI to write a blog post, I marvel at this technology’s capabilities. Even though I still need to edit, fact check, and do my due diligence to format and perfect the output, I spend far less time per post than I ever did before generative AI.
Remember, AI isn’t going to make writers obsolete. Instead, it’s a valuable, time-saving resource that enhances our workflows. Start using AI today and watch your productivity skyrocket.