Exciting Updates to Quillbee’s User Interface
We are thrilled to share the latest updates to Quillbee’s user interface.
To enhance simplicity and improve the overall user experience, we have made significant changes based on invaluable feedback from our users.
In this article, we will explore the exciting changes we’ve made to Quillbee’s UI and walk you through Quillbee, ensuring you can use and navigate our exceptional AI writing tool effortlessly.
New Updates to Quillbee Dashboard
One of the main areas we focused on was simplifying the navigation process in the Quillbee dashboard. We understand the importance of a user-friendly interface and have made significant improvements to enhance the overall user experience.
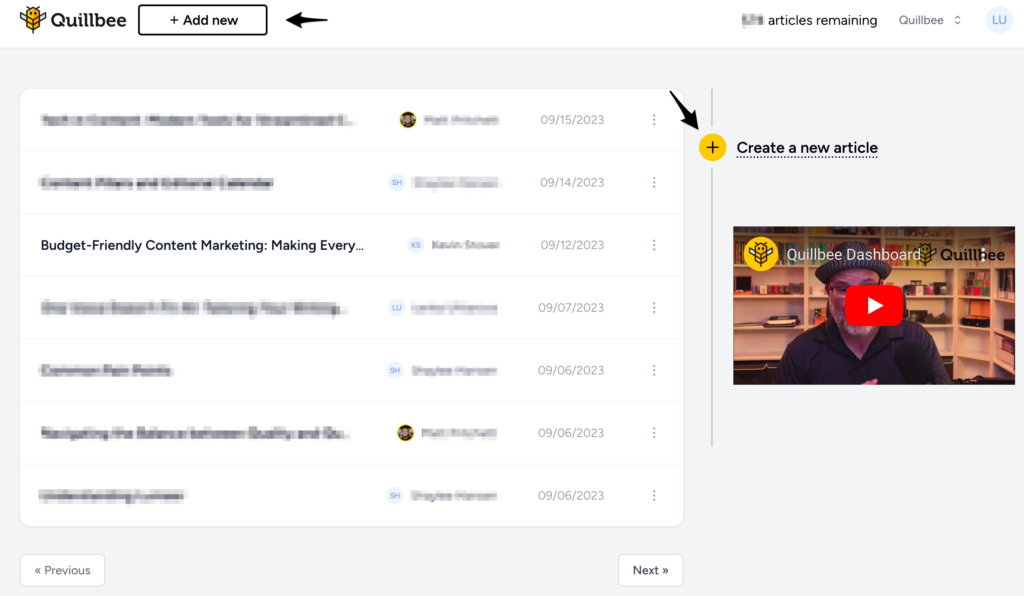
Now you have two ways you can create an article. One way is to use the “Add new” button next to the Quillbee logo. The other way to add a new article is using the yellow plus sign button “Create a new article”.
On the right side of your Quillbee dashboard is a video that will tell you a little bit more about Quillbee’s mission and will walk you through the dashboard.
On the same dashboard, you can see the list of all articles you’ve written, or the authors of the articles if you have a team of writers. You can also see the date when the article was created.
Starting a Fresh Article in Quillbee
Once you click the Add new button or Create a new article button, you will be prompted to describe your point of view on the topic you’ve chosen to write about.
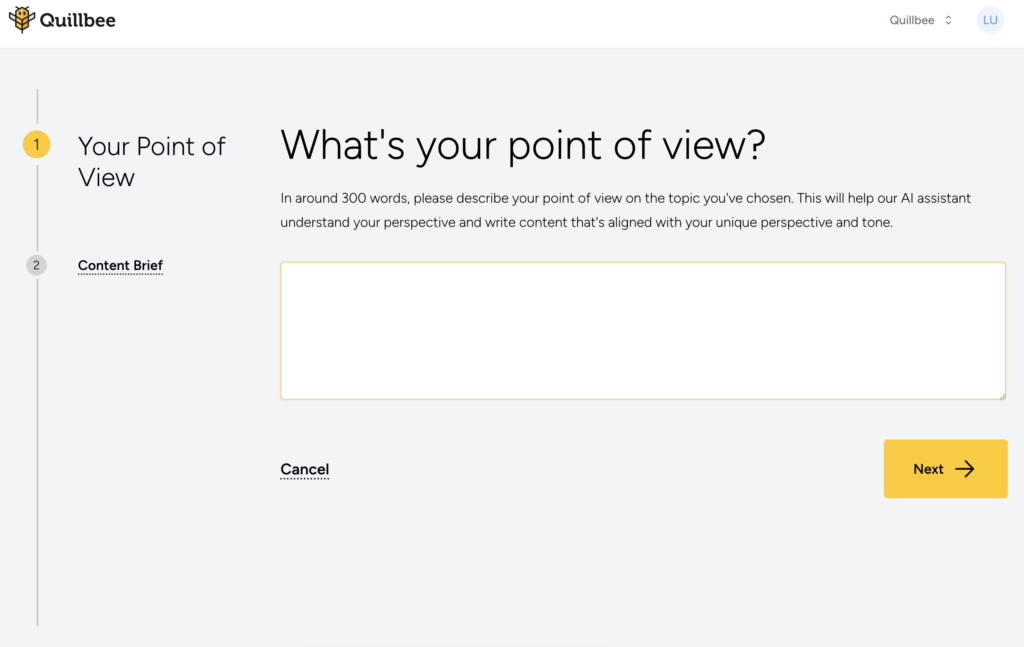
Your Point of View section puts your ideas front and center, allowing you to write in a manner that expresses your unique voice, setting your content apart from others. It’s the essence of Quillbee and a transformative tool for your writing.
The next one is the Content Brief. We are excited to share this one with you as this is the latest part of our new Quillbee UI update.

Thanks to Your Point of View, the Content Brief section will automatically populate the relevant fields. This includes the keyword, topic, tone words, and the perspective pronoun.
This saves you valuable time that would otherwise be spent trying to determine the focus of your article, the main keyword, or the tone you want to set for the content.
If the generated results don’t meet your expectations, you have the flexibility to edit them. Make the necessary changes and click the “Next” button to continue.
Generating Outline and Content in Quillbee
After clicking the “Next” button, the outline for your article will automatically start generating. This feature gives you a solid foundation for your article by creating a structured framework that organizes and shapes your ideas.

With the generated headlines, you can easily see the direction of your article and make any necessary tweaks to ensure your content flows naturally.
Whether you want to add, remove, or emphasize certain points, this tool allows you to customize your content and create an article that makes sense and captures your unique perspective.
You can also click Regenerate Outline if you want to start from scratch and don’t want to make any changes to the first Outline.
Now all that’s left is to finally generate your content. Click on the “Generate Content” button and let Quillbee take care of the rest. Sit back and watch as your ideas come to life with the help of our powerful AI writing tool!
Modifying Generated Content in Quillbee
After Quillbee finishes generating your article, you may want to refine and enhance your content. Perhaps you want to adjust the length of certain sections or ensure that it truly reflects your unique voice.
With the powerful Advanced Tools, you have the freedom to experiment and tailor your piece to your exact specifications. How does it work?
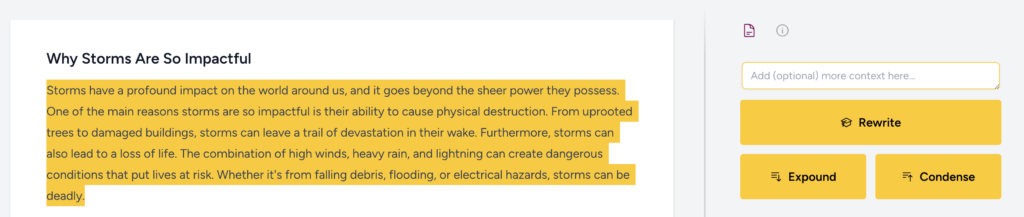
Highlight the text you wish to modify, and a dialog box will appear, offering options like Rewrite, Expand, or Condense. Make sure you have the paper icon selected first.
Additionally, within the same window box, you can provide further instructions by adding more context to the Add (optional) more context here field.
With Quillbee Advanced Tools, you can modify the tone, introduce new keywords, or incorporate additional data.
For instance, if you want to include statistics in your content, enter “include statistics” in the Add (optional) more context field and the suggested text will appear.
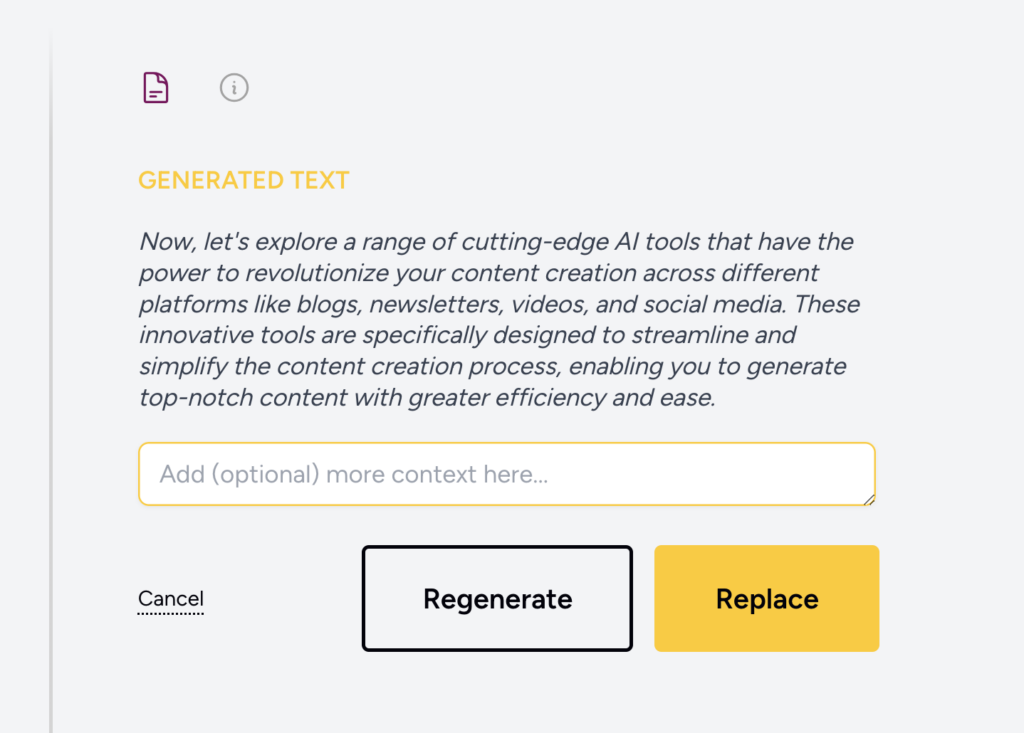
To replace the old text, click the Replace button. If you’re not satisfied with the suggestion, click Regenerate for a fresh option. It’s a straightforward process that empowers you to customize your content to your exact specifications.
Editing Brief in Quillbee
If you feel like your article is missing something or if you’ve had a change of perspective on the topic, don’t worry. You can easily refine your article without starting from scratch.
Quillbee allows you to edit your Brief settings and make changes to the keyword, topic, tone of the article, and more. To modify your brief settings, click on the information icon first.
In this section, you’ll have the ability to not only modify your brief settings but also track important metrics such as keyword density and article word count.

To make adjustments to your Brief, click on the button Edit Brief. This will take you to the beginning, where you can modify Your Point of View or Content Brief. That’s it. You’ve just learned about the new Quillbee UI!
Empower Your Writing with Quillbee – Your Ultimate AI-Writing Partner!
With these exciting UI updates in Quillbee, we’ve prioritized simplicity to enhance your writing experience. Our cleaner and more intuitive user interface ensures you can maximize productivity and navigate our AI tool with ease.
If you haven’t tried Quillbee yet, you can give it a spin with a 7-day free trial to unlock your full writing potential. Become the writer you’ve always aspired to be and experience a whole new level of your powerful AI writing tool. Try Quillbee today!